|
|
|
In This Issue:
|
| Flexible impeller issues |
| Oil pump performance |
| Engine checklist |
|
|
|
|
|
|
|
|
|
|
|
|
|
|
|
|
| Greetings to our Atomic 4 customers, and welcome to our Summer 2010 email newsletter. We have compiled the following information that we hope you find helpful. For a complete listing of our Atomic 4 parts & services, you may visit www.moyermarine.com or call our phone parts line, 610.421.4436. |
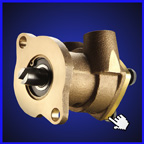
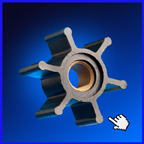
We receive a handful of reports each year in which an older Oberdorfer impeller has swelled to a size considerably larger than the dimensions of a new impeller. If an impeller is kept in service until it enlarges significantly beyond its original size (particularly in width), it will cause accelerated wear on the inside of the impeller chamber.
In some few cases, assuming the impeller itself survives, wear within the impeller chamber will so closely match the aging/swelling impeller that the pump will continue to function longer than expected. Unfortunately, these pumps will usually not accept a new (properly sized) impeller.
New Oberdorfer impellers measure 2” in diameter, and 7/8” across the width. If your pump will not work with a new impeller with these nominal dimensions, you have several options:
1) Reinstall the old impeller and continue to use the pump (not really recommended except as an emergency measure to get to a safe port).
2) If you have an older Oberdorfer M3 series pump (usually with big raised letters on the back plate), you can try replacing its cam shoe with a new M7 shoe. The M7 cam shoe is twice as thick as the M3 (1/8” versus 1/16”). The increased performance of the M7 shoe might allow the pump to continue working, at least as an emergency spare.
3) Replace the pump and begin changing the impeller after every second season or after 200 hours whichever comes first (after every third season or 300 hours for freshwater cooled engines).
|
|
Unless you, or someone in your pier group, happen to be scratching your heads over an oil pressure issue of some kind, the fact that we will soon be adding new oversized oil pump gears and shafts in our online catalog isn't likely to receive much attention at “happy hour” this weekend. That's OK. Until recently, oil pump gears weren't something that quickened our pulse all that much either.
We were actually first drawn to focus on oil pump performance in response to a growing number of reports of oil pressure issues which could not be explained by any of the traditional causes of low oil pressure. In the most common of these typical scenarios, oil pressure is seen to deteriorate over several hours of operation (presumably as oil thins), to the degree that the regulating valve is unable to maintain Universal's recommended minimum of 10 psi at idle and 30 psi at 2500 RPM.
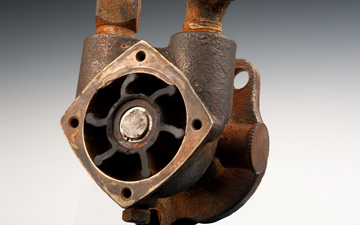
The challenge in measuring oil pump performance is that the pump is built into the rear main bearing cap from where it feeds directly into the pressurized oil system, making it impossible to measure its output independently from the rest of the oil system. We therefore had to construct a bench testing apparatus on which to mount the bearing cap and route the pump's output through a channel to a manual control valve, and then to a flow measuring chamber. This set-up enables us to measure the flow rate of a pump at various pressure and RPM settings totally independent of the rest of the pressurized oil system (I don't know how exciting that is, but it sure is fun).
We didn't have to test many pumps to note that performance varied greatly between pumps, and when we installed one of the poorer performing pumps in a test engine on our dynamometer, we were able to duplicate the symptom of decaying oil pressure over time - even in an engine with otherwise pristine bearing clearances.
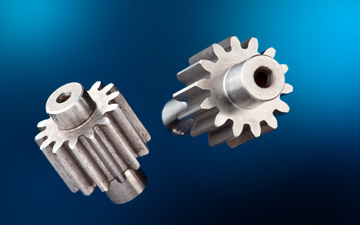
Bench testing pumps separately from the rest of the engine also enabled us to identify wear within the housing itself as the biggest factor in reduced performance. We therefore oversized our new gears (and their shafts) so that the main cap can be re-machined to restore original clearances between the gears, shafts, and the housing.
So, if you're involved in an engine overhaul and have any concern over your oil pressure, our new over-sized gears and shafts will enable you to restore like new performance in even the weakest oil pump. By the way, an Atomic 4 Trivial Pursuit question for your pier group: How many Gallons per Minute (GPM) will an oil pump produce with a set of our new gears at 1000 RPM and 40 psi? The answer is: One.
Now if that doesn't excite your happy hour group, we give up!
|
|
|
|
General: This check list is intended to be used in much the same manner as a physician performing an “annual physical” on one of his/her patients. It can be performed annually, or at any time you want to ascertain the condition of your engine. It goes without saying that items should be added or deleted, and time change suggestions adjusted until the check list best satisfies your individual needs.
Engine - Mechanical:
1) Check oil level (change every 50 hours or once each calendar year).
2) Check all belts for correct tightness. Alternators usually require a tighter fit than water pumps, and the geometry of three pulley systems (as with side mounted FWC pumps) require an even tighter fit. As a general starting point, check for a 1/2” total sideways deflection on alternator belts mid-way between the pulleys, and 3/4” deflection on front mounted FWC belts.
3) Check compression (80 psi or above on each cylinder). Variations between cylinders of 15 psi or more can usually be improved by applying 5 or 6 squirts of Marvel Mystery Oil (MMO) into the low cylinders. As long as the engine performance remains satisfactory, no heavier maintenance is usually necessary.
4) Wipe down engine with oily cloth (clean & touch up with engine enamel as necessary).
5) Check for oil leaks (best check is during engine operation or when warm).
6) Check engine mounts for security.
Ignition and electrical systems:
1) Check general condition of all wiring and for proper fuse protection (pay particular attention to the primary ignition circuit between the large battery terminal on the starter solenoid, through the ignition switch, and back to the positive terminal of the coil).
2) Check all batteries for a fully charged condition of 12.6+ volts.
3) Check spark plugs and replace if anything heavier than light dry sooting is evident.
4) Check & replace secondary ignition wires if brittle or cracked.
5) Measure resistance across the primary terminals of the coil. Normal range is between 3.5 and 4.5 ohms.
6) Measure resistance between secondary terminal and negative primary terminal (normal range from 8,000 to 11,000 ohms).
7) Measure resistance between the secondary terminal and the case of metal coils (normal reading is infinite - any indication of continuity here would warrant coil replacement).
8) If installed, check that contacts of points are clean and free of corrosion, and check to be sure the condenser is securely mounted to the breaker plate.
9) With engine running, loosen the distributor hold-down bracket and slowly rotate the distributor housing a small amount in each direction to find the location of best RPM. Tighten the hold-down bracket in this new location.
Cooling system (raw and fresh water cooled engines):
1) Check & clean raw water intake and raw water strainer (if installed).
2) Check all hoses for signs of softening or cracking (replace as necessary).
3) Replace raw water pump impeller and back plate gasket every 200 hours or after every second season (every 300 hours or every third season for FWC system fresh water pumps).
4) Remove water pump(s) for disassembly and rebuilding as required every 5 years.
Raw water cooled engines only:
1) Perform a pressure flush of the block, head, and manifold every three years.
2) Perform an acid flush before every other pressure flushing procedure or at least every 6 years.
3) Remove thermostat every 2 years and soak in vinegar until clean.
Fresh water cooled engines only:
1) Check antifreeze coolant (replace every 5 years).
2) Check zinc in FWC heat exchanger.
3) Remove and flush heat exchanger every 5 years. It's usually only necessary to remove the ends of the exchanger for flushing. If the exchanger has not been serviced for many years, it may be necessary to take it to an automotive radiator shop for cleaning.
Fuel system:
1) Check and replace fuel filter(s) as necessary, but start by replacing the primary filter once each year and the inline polishing filter (between fuel pump and carburetor) at least after every 3 years. If the primary filter is seen to be perfectly clean after one year, you can extend the change cycle to two years.
2) Clean flame arrestor on carburetor and apply a light coating of engine oil on the fins to increase its ability to attract dust.
3) Remove and clean the sediment bowl and sediment screen on the mechanical fuel pump every two years, replace if necessary. Replace bowl gasket if it has become hard and brittle.
4) Once each year, or after an extended lay-up, remove the 1/2” hex-headed main passage plug and flush several pints of fuel through the carburetor and into a clean glass jar. Be careful to NOT drop the fiber washer under the hex head into the bilge or over-tighten it on reinstallation. The priming lever can be used on mechanical fuel pumps. Electrical fuel pumps will normally have to have their oil safety switches bypassed with a jumper wire for this step before the ignition switch will operate the pump.
Reversing gear and drive train:
With engine not running:
1) Rotate prop shaft to confirm that it spins freely.
2) If boat is out of the water, clean the prop and prop shaft external to the boat, and replace the shaft zinc.
3) Check shifting cable for condition and freedom of movement. Clean and oil as necessary.
4) Check for a comfortable neutral range between forward and reverse.
With engine running:
1) Check forward latching mechanism for proper adjustment. Setting should be only tight enough to prevent slippage at full power. Tighter settings serve only to make it more difficult to engage and disengage forward.
2) Check for sufficient cable travel to provide a secure engagement of reverse (there is no latching mechanism in reverse).
Exhaust system:
1) Inspect hot (dry) section for excessive rust. Remove and replace insulating wrap if it is in deteriorated condition.
CAUTION: Older installations may have used wrap manufactured from asbestos. If removal of this hazardous material is required, follow your local codes and requirements.
2) Inspect the hot (dry) section to insure that it provides sufficient protection against engine cooling water from ever getting back into the exhaust manifold.
|
|
 |
Mr. Brian Geraghty, an engineer retired from the Ford Motor Company, corrected our understanding of synthetic oil not working well with the wet clutch in the Atomic 4 (refer to the last paragraph in the “Oil Changing Issues” section of our Spring 2010 Newsletter).
Brian has been successfully using synthetic oil (currently using 4 stroke Mobile 1 motorcycle oil) in his Atomic 4 for over 15 years which carries an SG designation. The SG rating is used by the American Petroleum Institute (API) to define the lubrication characteristics of oil (Brian describes this quality as its “slippery factor”). The API designation of SG insures that the oil will have a defined level of performance and will also work well in our forward clutch latching mechanisms.
The SG designation will work whether the oil is synthetic or “regular” oil, but since SG rated oil has almost entirely been discontinued within the general automotive industry, you will have to look for it at your local motorcycle dealership or in the motorcycle section of a local auto supply store. The current oils used for automotive applications use an API rating of SM which includes an energy efficient “slippery” package of friction modifiers which may make the wet clutch in the Atomic 4 slip.
Brian's bottom line is to use oil with an SG rating anytime you have difficulty finding a good adjustment on the latching mechanism of your forward clutch assembly, and you should feel free to use synthetic oil with an SG rating if your boating budget allows. Synthetic oils cost more, but deliver a broader range of high performance which can reduce costs in the long run. “Regular “ oil with an SG rating is perfectly acceptable and will also perform well in your wet clutch.
We thank Brian for his input...
|
|
www.moyermarine.com
Universal® is a registered trademark of Westerbeke Corporation
Copyright 2018 Moyer Marine, all rights reserved |